 I finally purchased a Canon FS100 Camcorder (just like the FS10 and FS11, but without any built-in memory) for making my famous DIY videos. Great little camera, very happy with it so far.
I found it very convenient to be able to transfer the recorded files over from the SD media to my PC, however, getting the resulting .MOD files (a flavor of MPEG2) into Adobe Premiere Pro proved to be a challenging experience.
Throughout this tutorial, I'm going to assume that you are recording your videos in wide-screen mode in the highest quality setting.
Step 0: Enable Adobe Premiere Pro CS3 to read MOD files
Copy the file ad2ac3dec.dll to the application root of Adobe Premiere Pro CS3.
Step 1: Get the files off the SD media.
Create a folder where you would like to copy your video files (give this folder the name of your project, in this example it will be SampleProject). Simply use either the supplied USB cable to connect the camera to the computer and browse it like an external drive or use a flash memory card reader to read the SD memory card directly.
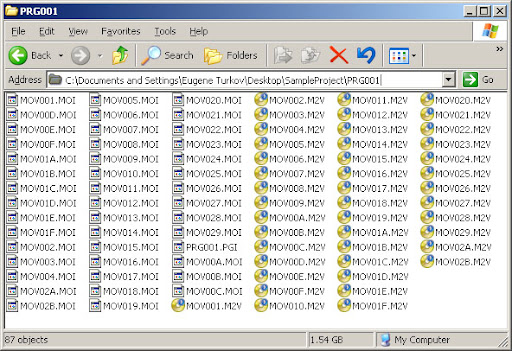
The video files on the Canon FS series are stored in SD_VIDEO/PRGXXX (in my case it's PRG001), so we want to copy or move the PRG001 folder to the SampleProject folder we created earlier. From now on when I mention the PRG001 folder, I am referring to the local copy, not the copy on the SD card.
Step 2: Rename the MOD files to M2V files
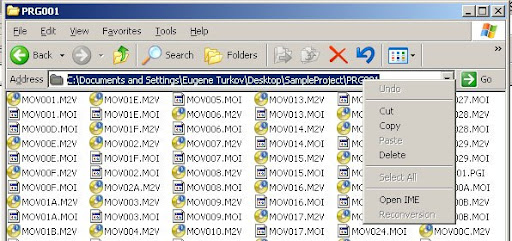
Open the PRG001 folder and copy its address:
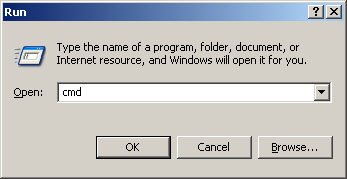
Next, click Start, run, and type in cmd to open up the command prompt application:

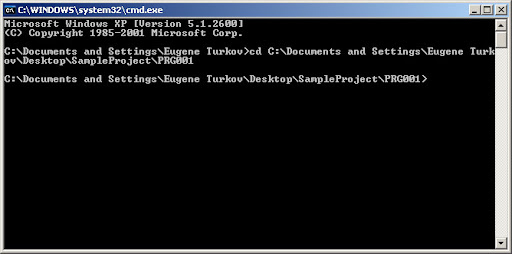
After hitting "OK," the cmd appliation will start. Type in the command cd (change directory) then type a space, right click on the cmd application and select the "paste" option and hit the ENTER key; see below:
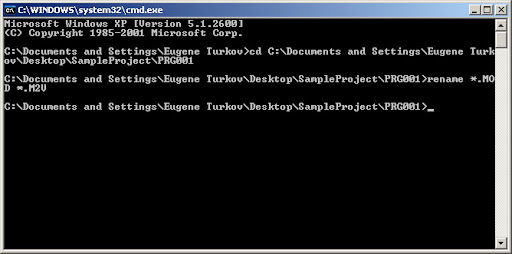
then type "rename *.MOD *.M2V" to rename all of the MOD files to M2V files:
Confirm that your PRG folder now contains M2V files instead of MOD files:
Step 3: Create A New Project
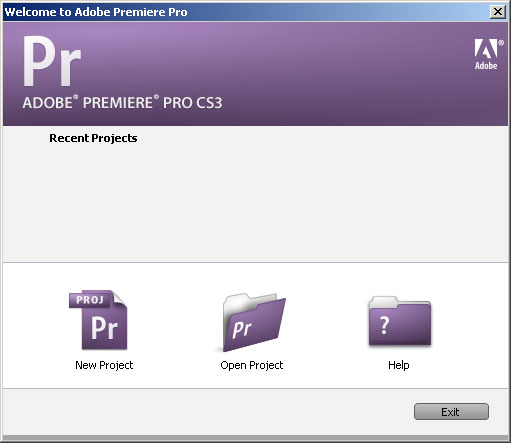
Open Adobe Premiere and select New Project:
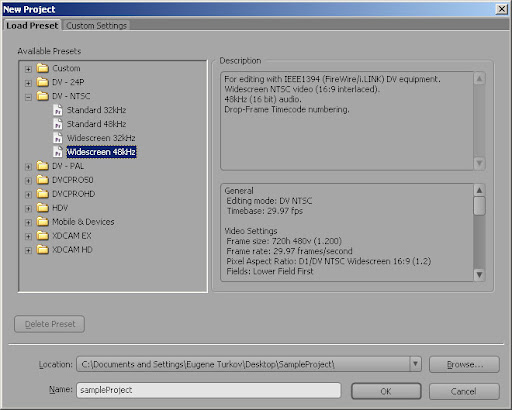
Next, select the preset DV - NTSC -> Widescreen 48kHz
For the location field, choose the parent of the PRG folder, and for the name field, use the same name as the parent folder (I also prefer to use a lower case letter as the first letter). Click "OK" to create the project.
Step 4: Import the Video Files
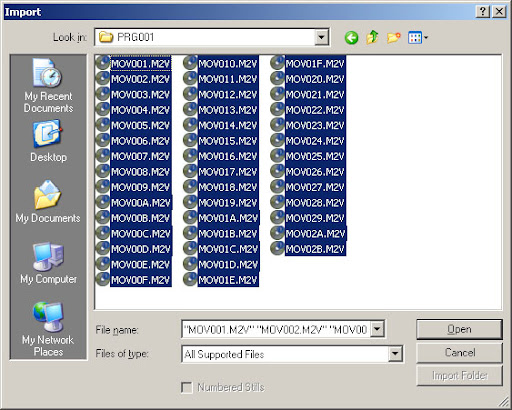
Select File -> Import and browse to the PRG folder. Sort the files by the modified property so that MOV001.M2V is at the top:
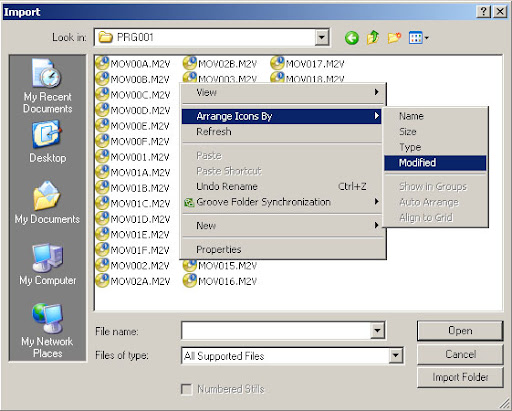
Note that in the above screen shot, the files haven't been sorted yet.
After you have properly sorted the files, select the very last file, then hold the SHIFT key and click on the very first file. The files will be imported correctly now. Just click "OK" to import the files.
Step 5:
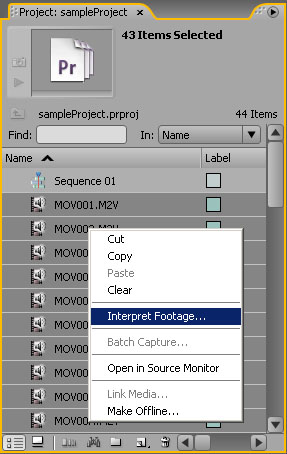
After premiere has finished pre-processing the files, select all of the newly imported files (you can use the same SHIFT + CLICK method as above), right click any one of the selected video files, and choose Interpret Footage...
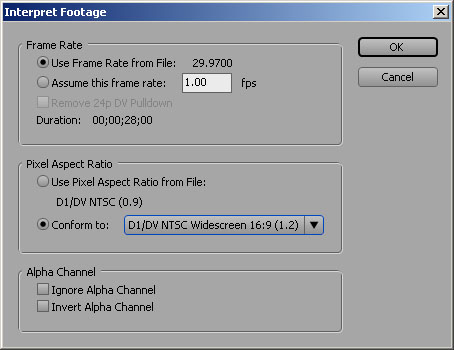
When the Interpret Footage dialog opens, change the Pixel Aspect Ratio to D1/DV NTSC Widescreen 16:9 (1.2) and click "OK"
Congratulations, you are now free to edit & export your video in 16:9 widescreen mode!
